Are you tired of encountering printing problems every time you try to print an important document? From paper jams to blurry prints, these issues can be frustrating and time-consuming to deal with. But don’t worry, troubleshooting common printing problems doesn’t have to be a daunting task.
In this article, we will explore some of the most common printing issues and provide you with practical solutions to overcome them. Whether you’re using a home printer or a professional office printer, these troubleshooting tips will help you get back to printing smoothly and efficiently.
So, if you’re ready to say goodbye to printing headaches and hello to hassle-free printing, keep reading to discover how to troubleshoot common printing problems.
Common Printing Problems
Printing problems can be frustrating and can hinder productivity. Here are some common issues users may encounter and tips for troubleshooting them promptly.
Error Messages
Error messages are a common occurrence when it comes to printing, and they can be quite frustrating to deal with. These messages can be an indication of various issues, ranging from connectivity problems to low ink levels.
Understanding Error Messages
When encountering printing problems, it’s essential to understand the error messages that your printer may display. These messages can provide valuable information to diagnose and troubleshoot issues effectively.
Most printers have a warning light or screen that will indicate when an error occurs. The error message displayed will depend on the specific printer model. To interpret the error message accurately, it’s recommended to consult the user manual that came with your printer. The manual will provide detailed explanations and instructions on how to resolve common issues associated with the displayed error message.
Remember to consult the user manual for your printer model to get the most accurate interpretation of the error message. In many cases, the manual will also provide step-by-step solutions to resolve the issue. By understanding these error messages, you can troubleshoot printing problems effectively and get your print jobs back on track.
Troubleshooting Error Messages
Troubleshooting error messages on your printer can be easily done by consulting the user manual that came with your specific printer model. The user manual contains detailed information on how to interpret self-diagnosed errors and provides step-by-step instructions on resolving common issues.
To access the user manual, locate the documentation that came with your printer. It could be a physical booklet or a digital copy that can be found on the manufacturer’s website. Navigate to the section that specifically addresses error messages or troubleshooting.
When encountering an error, check the warning lights or screen on your printer. These indicators can provide valuable information on the nature of the error. If a warning light is illuminated or a message is displayed on the screen, consult the user manual to identify the error and find the corresponding solution.
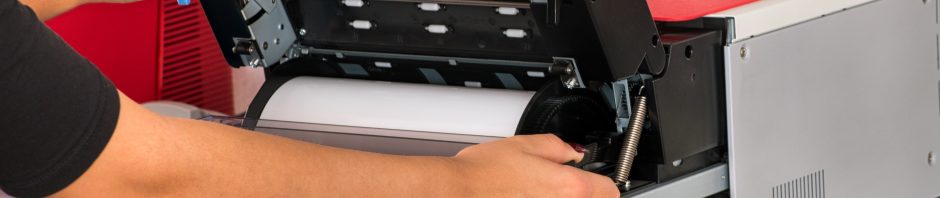
Paper Jams
Paper jams are one of the most common printing problems that can occur, causing frustration and disrupting workflow. Fortunately, troubleshooting paper jams is relatively straightforward and can often be resolved without the need for professional assistance.
Understanding Paper Jams
One of the most common printing problems that users encounter is a paper jam. This occurs when the paper becomes misaligned or gets stuck inside the printer. Understanding the causes of paper jams and how to prevent them can help you save time and frustration.
Paper jams often occur when the paper is not aligned properly in the tray. To prevent this, make sure to load the paper in the tray according to the manufacturer’s instructions. Align the paper guides to fit snugly against the sides of the paper, preventing it from shifting during printing.
Another cause of paper jams is exceeding the tray’s paper limit. Each printer has a maximum paper capacity, and if you overload the tray, jams are more likely to occur. Be sure to check the printer’s manual for the maximum paper capacity and avoid overfilling the tray.
Using the incorrect media type setting can lead to paper jams. The printer may struggle to handle certain types of paper or envelopes if the media type setting is not adjusted accordingly. Always double-check that the media type setting matches the surface you’re printing on.
Preventing Paper Jams
One of the most frustrating printing problems that users encounter is a paper jam. However, there are steps you can take to prevent paper jams and ensure hassle-free printing.
Firstly, using good quality paper that fits within the manufacturer’s specifications is essential. Cheap or low-quality paper may be prone to jamming. Check your printer’s manual or website to find the recommended paper type and weight for optimal performance.
Secondly, proper handling and loading of the paper is crucial. Ensure that the paper is aligned correctly in the tray, and the paper guides are snugly against the sides. Overloading the tray with too much paper can also lead to jams, so be sure to adhere to the printer’s maximum paper capacity.
Regularly cleaning the printer is another preventive measure. Dirt particles or debris can accumulate in the paper path, increasing the chances of a paper jam. Use a clean, dry cloth to wipe down the inside of the printer, and remove any loose paper fragments.
Removing A Jammed Paper
If you encounter a paper jam while printing, follow these step-by-step instructions to safely remove the jammed paper from your printer:
1. Turn off the printer: It’s important to start by turning off the printer to prevent any damage or injury.
2. Open the printer: Locate the printer’s access panel or cover and open it up to gain access to the internal components.
3. Identify the jammed paper: Look for the jammed paper inside the printer. It may be visible or partially hidden. Take note of its location and how it is stuck.
4. Extract the paper: Gently and carefully pull out the jammed paper in the direction of its normal feeding path. Avoid tearing the paper, as remnants can cause additional jams.
5. Check for any remaining paper: After removing the jammed paper, double-check the printer’s paper path to ensure no small scraps or bits are left behind.
6. Inspect and replace rollers: Over time, the paper rollers can wear out or become dirty, leading to paper jams. Take the opportunity to inspect the rollers and clean or replace them if necessary.
7. Close the printer: Once you have successfully removed the jammed paper and inspected the rollers, close the printer’s access panel securely.
8. Turn on the printer: After closing the printer, turn it back on and try a test print to ensure that the paper jam issue has been resolved.
Printer Settings And User Manuals
Printer settings are an important aspect of troubleshooting common printing problems. When encountering issues with print jobs, it is often helpful to check and adjust settings to ensure optimal performance.
Understanding Printer Settings
Printer settings play a crucial role in the overall printing process. Whether you are trying to troubleshoot common printing issues or optimize print quality, it is important to have a good understanding of the different printer settings and their functions.
To access printer settings, you typically need to open the Print dialog box. This can be done by selecting the “Print” option from the File menu of an application or by right-clicking on a file and selecting “Print.” Once the Print dialog box appears, you can find printer settings under various tabs or dropdown menus, depending on your printer model.
Some of the common printer settings include print quality, paper type, paper size, page orientation, and color options. Adjusting these settings according to your specific requirements can greatly improve the output of your print jobs. For example, selecting a higher print quality setting can result in sharper and more vibrant prints, while choosing the correct paper type can prevent smudging or fading.
Understanding printer settings is essential for troubleshooting printing problems effectively. By having knowledge of the available settings and their functions, you can identify and correct issues such as print quality discrepancies, paper jams, or errors related to incompatible paper types. Additionally, adjusting certain settings like color options or page orientation can resolve specific printing errors and improve the overall outcome of your print jobs.
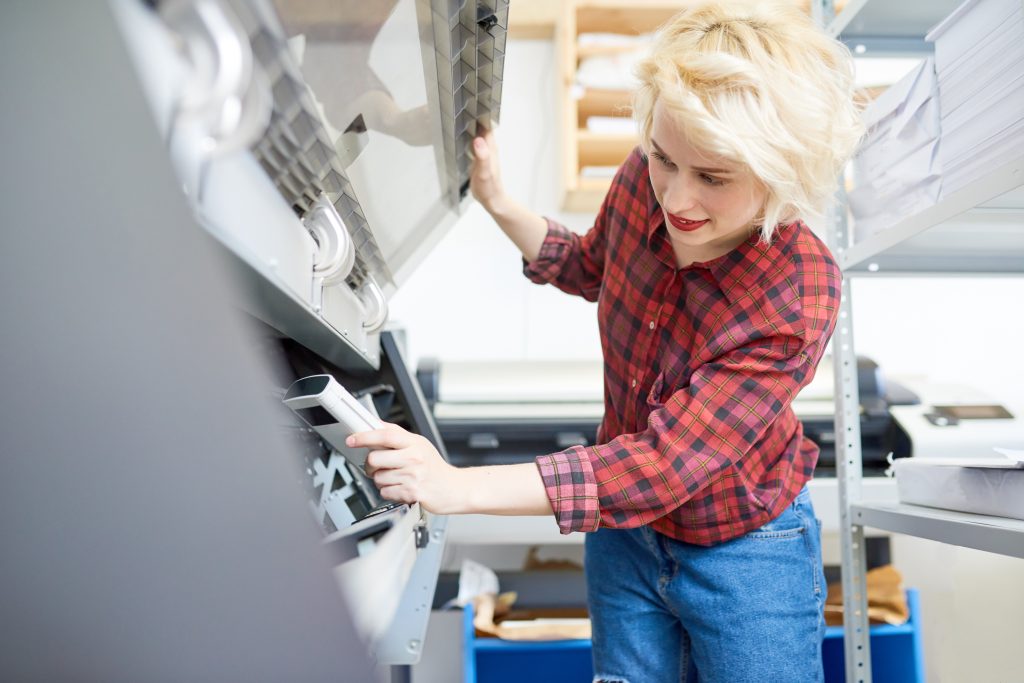
Accessing Printer Manuals/User Guides
Printer manuals or user guides are valuable resources that provide information on troubleshooting common printer issues. Whether you are experiencing paper jams, print quality discrepancies, or other problems, referring to the printer manual can help you identify and resolve the issue.
To access the printer manual or user guide, there are a couple of options available. Firstly, you can check if a physical copy of the manual was included with your printer when you purchased it. This manual typically contains step-by-step instructions, troubleshooting tips, and other useful information specific to your printer model.
If you do not have a physical copy of the manual, you can visit the manufacturer’s website to download a digital copy. Most printer manufacturers have a support or downloads section on their website where you can find documentation for their range of printers. Simply locate your printer model and look for the user guide or manual in PDF format.
Ink Cartridges And Ink Levels
Ink cartridges and ink levels play a crucial role in printing quality and efficiency. When troubleshooting common printing problems, it’s important to address any issues related to ink cartridges and their levels. One common issue is running out of ink during a print job.
Checking Ink Cartridge Levels
Checking the ink cartridge levels is an essential step in troubleshooting common printing problems. It is important to ensure that ink cartridges are not empty or low on ink, as this can cause issues such as poor print quality or incomplete print jobs.
To check ink cartridge levels, start by accessing the printer settings on your computer. This can typically be done by right-clicking on the printer icon and selecting “Printer Preferences” or “Printer Properties.” Once in the printer settings, navigate to the ink or maintenance section.
In this section, you should be able to view the ink levels for each cartridge installed in your printer. Some printers may display a percentage or a graphic representation of the ink levels. If any cartridge appears to be empty or low, it is recommended to replace or refill it.
By regularly checking ink cartridge levels, you can prevent printing issues and ensure that your prints come out as expected. It is always a good practice to keep spare ink cartridges on hand, especially if you frequently print large documents or photos.
Replacing Ink Cartridges
Replacing ink cartridges in your printer is a straightforward process, but it is important to follow the correct steps to ensure a successful replacement. Here’s how you can replace ink cartridges in your printer:
1. Check the printer settings: Before replacing ink cartridges, access the printer settings on your computer. Ensure that you have the correct ink cartridge model for your printer. This information can usually be found in the printer settings or in the user manual.
2. Properly insert the new cartridges: Turn on your printer and open the cartridge compartment. Carefully remove the old cartridges, making sure to note their positions. Take the new cartridges out of their packaging and remove any protective tapes. Insert the new cartridges into their respective slots, ensuring that they are properly seated and securely inserted.
3. Consult the user manual: If the printer website for your specific model. The user manual will provide you with detailed instructions on how to safely replace ink cartridges in your specific printer model.
Conclusion
In conclusion, troubleshooting common printer problems can be a simple process if you follow the right steps. We have discussed various solutions such as checking printer settings, properly inserting new cartridges, and consulting the user manual. These steps can help you address issues like print jobs not completing, error messages, paper jams, and incorrect paper types.